Grepolis App: Difference between revisions
| (51 intermediate revisions by 7 users not shown) | |||
| Line 1: | Line 1: | ||
[[File:Ios app icon.png|center|170px]] | |||
The Grepolis App provides a convenient way of playing Grepolis on your mobile device and grants | The Grepolis App provides a convenient way of playing Grepolis on your mobile device and grants access to the game features needed to maintain your game account. This wiki page will aid you in using the app by defining the apps user interface and also displaying the little differences in usability between app and browser version. | ||
*Note that the app is now available on iOS and Android devices. | |||
==Availability== | ==Availability== | ||
[[File:Apple_store_big.png|center|link= | {| border="1px" cellspacing="0" class="wikitable" | ||
! colspan=2|iOS | |||
|- | |||
! .EN | |||
! .US | |||
|- | |||
|[[File:Apple_store_big.png|center|link=http://itunes.apple.com/en/app/grepolis-divine-strategy-mmo/id662842594?ls=1&mt=8]] | |||
|[[File:Apple_store_big.png|center|link=http://itunes.apple.com/us/app/grepolis-divine-strategy-mmo/id662842594?ls=1&mt=8]] | |||
|- | |||
!colspan=2|Android | |||
|- | |||
!colspan=2|.EN & .US | |||
|- | |||
|colspan=2|[[File:Playstore.jpeg|center|link=https://play.google.com/store/apps/details?id=air.com.innogames.grepolis]] | |||
|} | |||
==Requirements== | |||
===iOS devices (minimum requirements)=== | |||
* iPod touch 5, iPhone 5, iPad 2, iPad mini, or iPad with Retina Display | |||
* iOS 9 or higher | |||
* Internet connection on your device | |||
===Android devices=== | |||
*Android 4.1 and above | |||
*160dpi screen resolution and higher | |||
*Internet connection on your device | |||
==Core Features== | ==Core Features== | ||
| Line 13: | Line 38: | ||
==Registration and Login== | ==Registration and Login== | ||
If you are a new player you can choose to | If you are a new player you can choose to play the game without registering an account. This option will automatically generate a guest account for you. In order to save the progress of your game however, you will still have to register your account at a later point in time. This will be triggered as a special part of the tutorial. The corresponding quest will ask you to choose a name and register your account. | ||
<br><br> | <br><br> | ||
[[File:App_direct_play_1 | [[File:App_direct_play_1.png|384px]] | ||
<br><br><br> | <br><br><br> | ||
If you have played the browser version before, you can use the login to access the game with your existing account. But you can also register a new account using the registration screen of the app. | If you have played the browser version before, you can use the login to access the game with your existing account. But you can also register a new account using the registration screen of the app. Please remember that you can only have one active player account per world. | ||
<br><br> | <br><br> | ||
[[file:App login.png|384px]] [[File:App register.png|384px]] | [[file:App login.png|384px]] [[File:App register.png|384px]] | ||
<br><br><br> | <br><br><br> | ||
==The User Interface== | ==The User Interface== | ||
===Top Menu=== | ===Top Menu=== | ||
The top menu is shown across the whole application regardless which screen you are currently using (e.g. island, or city overview). | The top menu is shown across the whole application regardless which screen you are currently using (e.g. island view, or city overview). | ||
<br><br>[[File:App_top_menu.png|center]]<br><br> | <br><br>[[File:App_top_menu.png|center]]<br><br> | ||
This menu displays your current resources (wood, | This menu displays your current resources (wood, stone, silver coins, available population, and gold), your current rank, your currently selected city, the god worshiped in this town, current favor of that god, and important events such as an incoming attack. The attack icon will only flash if there is an incoming attack on one of your cities. | ||
===Touch Gestures=== | ===Touch Gestures=== | ||
| Line 43: | Line 70: | ||
| | | | ||
# Opens the rankings page. | # Opens the rankings page. | ||
# Opens the | # Opens the spells menu. | ||
# Opens a list of your cities. | # Opens a list of your cities. | ||
# Change to the previous | # Change to the previous or the next city on the list. | ||
|- | |- | ||
| align="center" | '''Double Tap''' | | align="center" | '''Double Tap''' | ||
| Line 57: | Line 84: | ||
| align="center" | Change to the previous town or the next town on the list. | | align="center" | Change to the previous town or the next town on the list. | ||
|} | |} | ||
==City List== | ==City List== | ||
Tapping the city frame will open the city list screen. Here you will have a list of all your cities and their points. By tapping a city name you will directly be taken to the corresponding city overview. There is a difference between the basic city list and the city list with an activated administrator. When you have the administrator activated the city list has more detailed information for each of your cities additionally displaying available resources and current activities such as ongoing construction or recruitment. | Tapping the city frame will open the city list screen. Here you will have a list of all your cities and their points. By tapping a city name you will directly be taken to the corresponding city overview. There is a difference between the basic city list and the city list with an activated administrator. When you have the administrator activated, the city list has more detailed information for each of your cities; additionally displaying available resources and current activities such as ongoing construction or recruitment. | ||
<br><br>[[File:App_city_list.png|384px]][[file:App_city_list_premium.png|384px]]<br><br> | <br><br>[[File:App_city_list.png|384px]] [[file:App_city_list_premium.png|384px]]<br><br> | ||
Tapping an arrow next to a city name will take you directly to that city overview, unless you are on the map, then it will center your view on selected city instead. | Tapping an arrow next to a city name will take you directly to that city overview, unless you are on the map, then it will center your view on the selected city instead. | ||
===Ranking=== | ===Ranking=== | ||
Tapping the ranking icon will open the ranking list. You can browse through the following types of rankings: | Tapping the ranking icon will open the ranking list. You can browse through the following types of rankings: | ||
* Players (ranking points) | |||
* Players ocean (ranking points) | |||
* Alliances (ranking points) | |||
* Alliances ocean (ranking points) | |||
* Attackers (battle points) | |||
* Defenders (battle points) | |||
* Fighters (battle points) | |||
* Attacker alliances (battle points) | |||
* Defenders alliances (battle points) | |||
* Fighters alliances (battle points) | |||
* World wonders | |||
For information about what some of those terms mean, click [http://wiki.en.grepolis.com/wiki/Abbreviations here]. | |||
[[file:App_ranking.png|center|384px]] | [[file:App_ranking.png|center|384px]] | ||
===Cast Spells=== | ===Cast Spells=== | ||
Tapping the god icon will open the spell window. You can | Tapping the god icon will open the spell window. You can cast selected spell on your currently selected city from here. | ||
[[file:app_cast_spell.png|384px|center]] | [[file:app_cast_spell.png|384px|center]] | ||
===Main Menu=== | ===Main Menu=== | ||
The main menu | The main menu can be opened by the icon on the bottom right. It features the following buttons: | ||
* | |||
* | * Overviews | ||
* | * Inventory | ||
* | * Premium | ||
*Alliance | * Advisor | ||
* | * Alliance | ||
* | * Alliance forum | ||
*Profile | * Messages | ||
*Settings | * Reports | ||
* | * Ranking | ||
* Profile | |||
* Settings | |||
* Support | |||
* Wiki | |||
* Forum | |||
* Leave world | |||
[[file:app_main_menu.png|center]] | [[file:app_main_menu.png|center]] | ||
===Ring Menu=== | ===Ring Menu=== | ||
The ring menu will pop up whenever you tap an eligible element on the map. Depending on the object all possible interactions are shown in form of the ring menu. In this example we have selected an enemy city and can now choose to attack or support this city, trade or put a spell on it, or send a spy. | The ring menu will pop up whenever you tap an eligible element on the map. Depending on the object, all possible interactions are shown in form of the ring menu. In this example we have selected an enemy city and can now choose to attack or support this city, trade or put a spell on it, or send a spy. | ||
[[file:app_ring_menu.png|384px|center]] | [[file:app_ring_menu.png|384px|center]] | ||
== | ==The Map== | ||
The | The map screen is one of the most important features of the app because it is used for your main navigation. It provides a clear overview about islands including all kinds of cities, farming villages, free slots, world wonders, and other information that is interesting for players. Seamless zooming combines the island overview as well as the world overview from the browser version in only one feature. This means that there is no separation between island and world maps anymore. | ||
[[file: | [[file:app_map_navigation1.png|384px]] [[file:app_map_navigation.png|384px]] | ||
==The City== | ==The City== | ||
The city overview is similar to the browser version. You can interact with all buildings available in your city by tapping them. To increase usability of this view you can zoom in and out and also move your city to access your points of interest just like the navigation on the map.<br><br> | The city overview is similar to the browser version. You can interact with all buildings available in your city by tapping them. To increase usability of this view you can zoom in and out and also move your city to access your points of interest just like the navigation on the map.<br><br> | ||
[[file:app_city_overview.png|384px]][[file:app_city_navigation.png|384px]]<br><br> | [[file:app_city_overview.png|384px]] [[file:app_city_navigation.png|384px]]<br><br> | ||
==Construction== | ==Construction== | ||
The construction menu available through the senate has a different layout compared to the browser version. Greyed out buildings have not yet been constructed and each building has an indicator of its current level. You can also see current constructions. In our example the farm is currently being upgraded from level | The construction menu available through the senate has a different layout compared to the browser version. Greyed out buildings have not yet been constructed and each building has an indicator of its current level. You can also see current constructions. In our example the farm is currently being upgraded from level 8 to 9 which is shown by the progress bar and the green 9. If you close the screen and tap on the hammer icon on the left in the UI, you can see the construction queue of the senate.<br><br> | ||
[[file: | [[file:app_construction.png|254px]] [[file:app_senate.png|254px]] [[file:app_construction_queue.png|254px]]<br><br> | ||
==Recruitment== | ==Recruitment== | ||
The recruitment process in the barracks and harbor is also slightly different from the browser version. Each unit has an elaborate information screen and you can enter your desired amount of units to be recruited or simply use the slider at the bottom to determine the desired value. Current recruitment orders can also be followed by progress bars. | The recruitment process in the barracks and harbor is also slightly different from the browser version. Each unit has an elaborate information screen and you can enter your desired amount of units to be recruited or simply use the slider at the bottom to determine the desired value. Current recruitment orders can also be followed by progress bars. | ||
[[file:App_recruitement.png| | [[file:App_recruitement.png|center|384px]] | ||
==Research== | ==Research== | ||
The research table of the academy is designed to provide information on each research as well as its availability. Here you can select to research any technology available and also check which technologies have already been researched in this city. At the top of this window you can directly slide right to the research queue to view the current research progress in your city.<br><br> | The research table of the academy is designed to provide information on each research as well as its availability. Here you can select to research any technology available and also check which technologies have already been researched in this city. At the top of this window you can directly slide right to the research queue to view the current research progress in your city.<br><br> | ||
[[file:app_research.png|384px]][[file:app_research_queue.png|384px]]<br> | [[file:app_research.png|384px]] [[file:app_research_queue.png|384px]]<br> | ||
==Worship== | ==Worship== | ||
It is very easy to worship a god in your temple overview. At the top you can slide between the | It is very easy to worship a god in your temple overview. At the top you can slide between the gods and use the button in the center of the screen to worship or change your god. The info button will display more detailed information about the corresponding god. | ||
[[file:App_god.PNG|384px|center]] | [[file:App_god.PNG|384px|center]] | ||
==Tutorial and Quest System== | ==Tutorial and Quest System== | ||
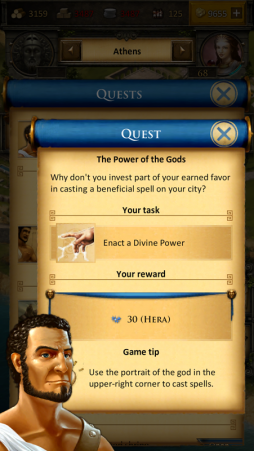
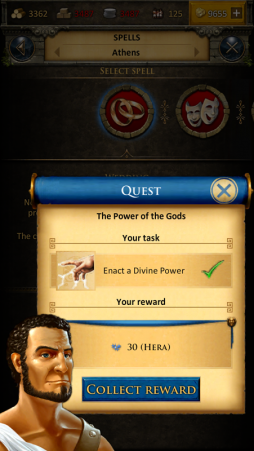
The game's tutorial and quest system will also be fully accessible in the app, however, it is displayed somewhat | The game's tutorial and quest system will also be fully accessible in the app, however, it is displayed somewhat differently compared to the browser version of Grepolis. The first tutorial quests will automatically pop up when they are available. You can also choose to click the quest symbol in your interface to access the quest list. In this list all available quests are displayed also showing the current status (e.g. open or active). From here you can simply select a quest to access further information and actions regarding this specific quest. The tutorial is designed to guide your first steps in the game. You can complete the tutorial quests to get its features explained. | ||
[[File:app_questsystem1.png|254px]] [[File:app_questsystem2.png|254px]] [[File:app_questsystem3.png|254px]] | |||
Latest revision as of 14:35, 20 September 2018
The Grepolis App provides a convenient way of playing Grepolis on your mobile device and grants access to the game features needed to maintain your game account. This wiki page will aid you in using the app by defining the apps user interface and also displaying the little differences in usability between app and browser version.
- Note that the app is now available on iOS and Android devices.
Availability
| iOS | |
|---|---|
| .EN | .US |
| Android | |
| .EN & .US | |
Requirements
iOS devices (minimum requirements)
- iPod touch 5, iPhone 5, iPad 2, iPad mini, or iPad with Retina Display
- iOS 9 or higher
- Internet connection on your device
Android devices
- Android 4.1 and above
- 160dpi screen resolution and higher
- Internet connection on your device
Core Features
- Fast & easy account management
- Full mobile accessibility
- Push notifications
- Simple touch gestures
Registration and Login
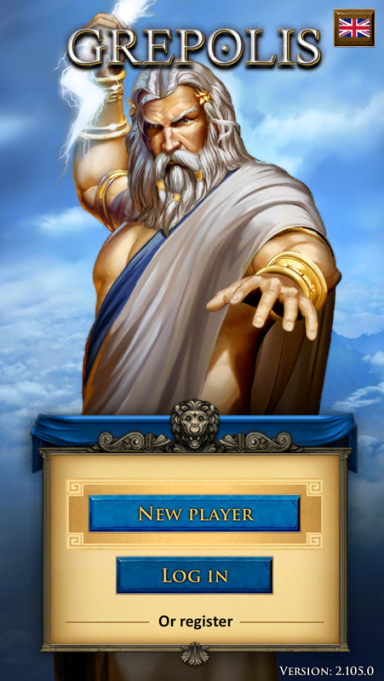
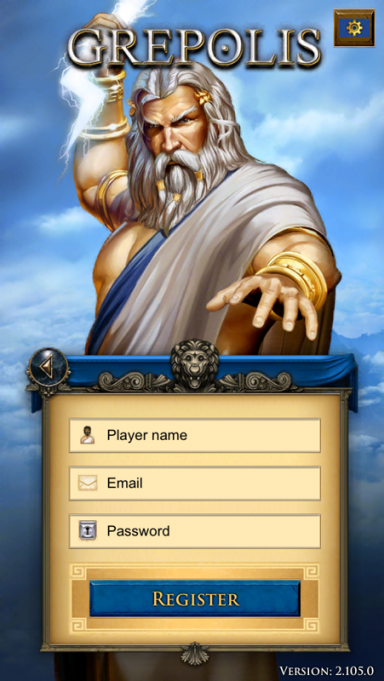
If you are a new player you can choose to play the game without registering an account. This option will automatically generate a guest account for you. In order to save the progress of your game however, you will still have to register your account at a later point in time. This will be triggered as a special part of the tutorial. The corresponding quest will ask you to choose a name and register your account.
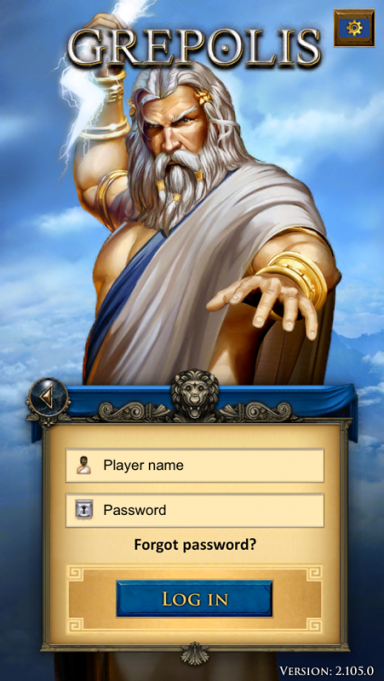
If you have played the browser version before, you can use the login to access the game with your existing account. But you can also register a new account using the registration screen of the app. Please remember that you can only have one active player account per world.
The User Interface
Top Menu
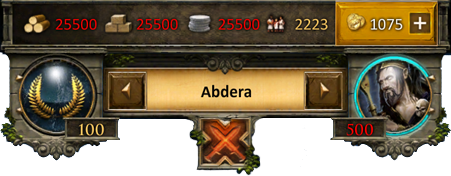
The top menu is shown across the whole application regardless which screen you are currently using (e.g. island view, or city overview).
This menu displays your current resources (wood, stone, silver coins, available population, and gold), your current rank, your currently selected city, the god worshiped in this town, current favor of that god, and important events such as an incoming attack. The attack icon will only flash if there is an incoming attack on one of your cities.
Touch Gestures
| Gesture | Action | Outcome |
|---|---|---|
| Tap |
|
|
| Double Tap | Double tap a city when on the map view. | Find the city that you have tapped on on the map. |
| Press and Move | Press and move from the city name to the left or right. | Change to the previous town or the next town on the list. |
City List
Tapping the city frame will open the city list screen. Here you will have a list of all your cities and their points. By tapping a city name you will directly be taken to the corresponding city overview. There is a difference between the basic city list and the city list with an activated administrator. When you have the administrator activated, the city list has more detailed information for each of your cities; additionally displaying available resources and current activities such as ongoing construction or recruitment.
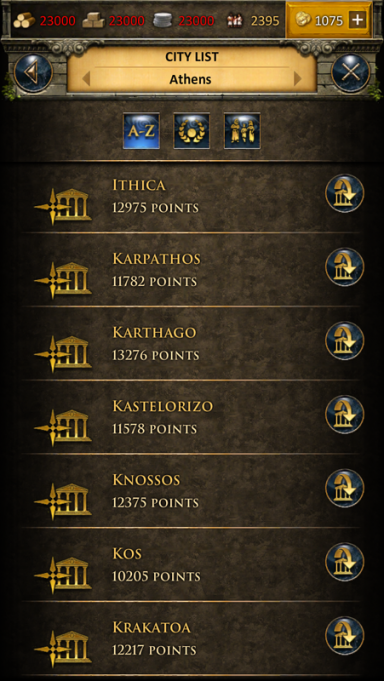
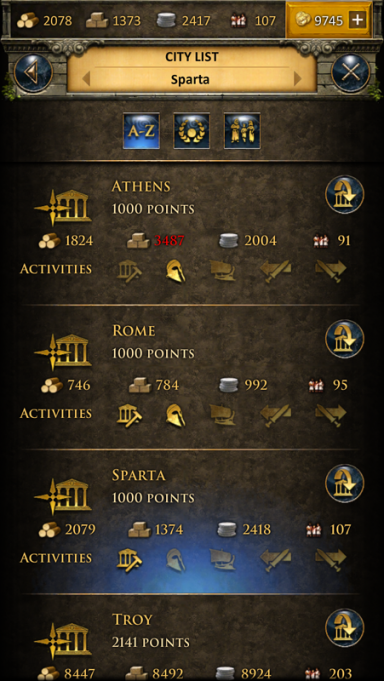
Tapping an arrow next to a city name will take you directly to that city overview, unless you are on the map, then it will center your view on the selected city instead.
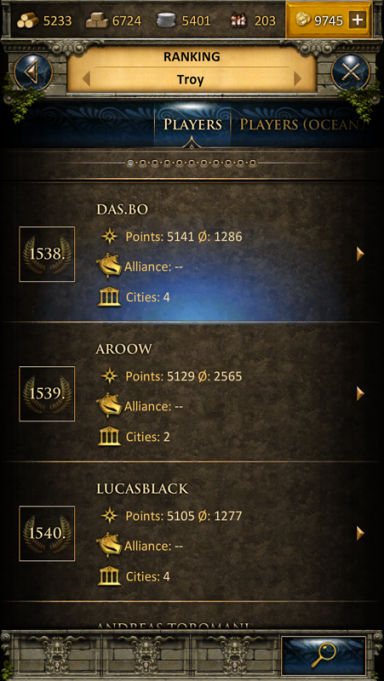
Ranking
Tapping the ranking icon will open the ranking list. You can browse through the following types of rankings:
- Players (ranking points)
- Players ocean (ranking points)
- Alliances (ranking points)
- Alliances ocean (ranking points)
- Attackers (battle points)
- Defenders (battle points)
- Fighters (battle points)
- Attacker alliances (battle points)
- Defenders alliances (battle points)
- Fighters alliances (battle points)
- World wonders
For information about what some of those terms mean, click here.
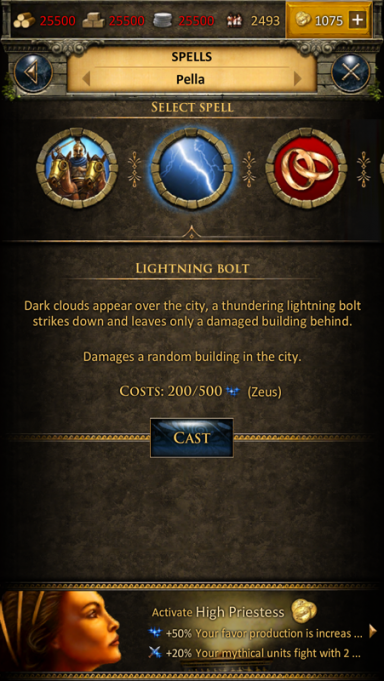
Cast Spells
Tapping the god icon will open the spell window. You can cast selected spell on your currently selected city from here.
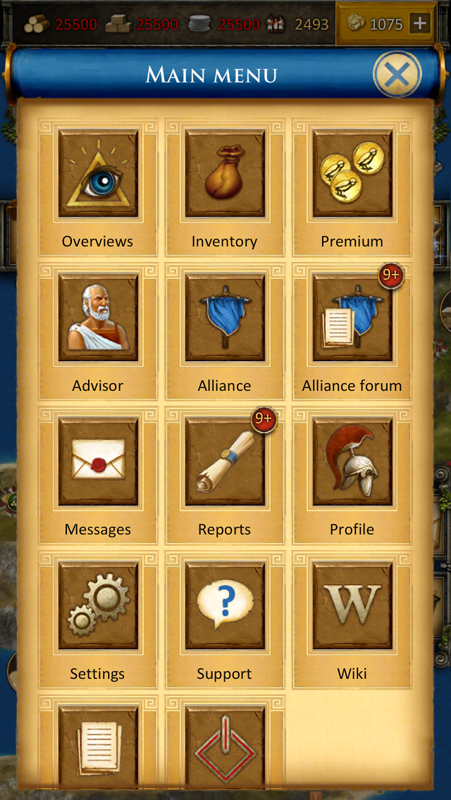
Main Menu
The main menu can be opened by the icon on the bottom right. It features the following buttons:
- Overviews
- Inventory
- Premium
- Advisor
- Alliance
- Alliance forum
- Messages
- Reports
- Ranking
- Profile
- Settings
- Support
- Wiki
- Forum
- Leave world
Ring Menu
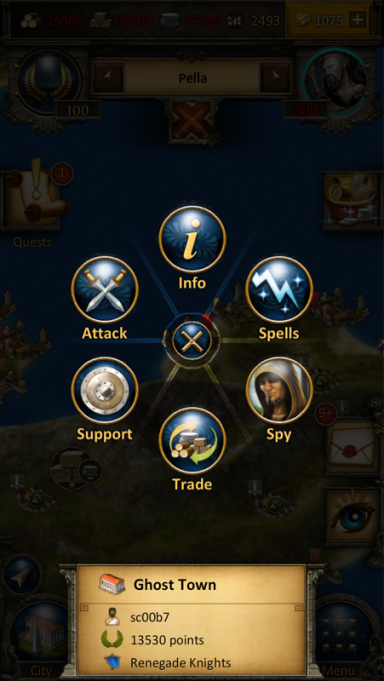
The ring menu will pop up whenever you tap an eligible element on the map. Depending on the object, all possible interactions are shown in form of the ring menu. In this example we have selected an enemy city and can now choose to attack or support this city, trade or put a spell on it, or send a spy.
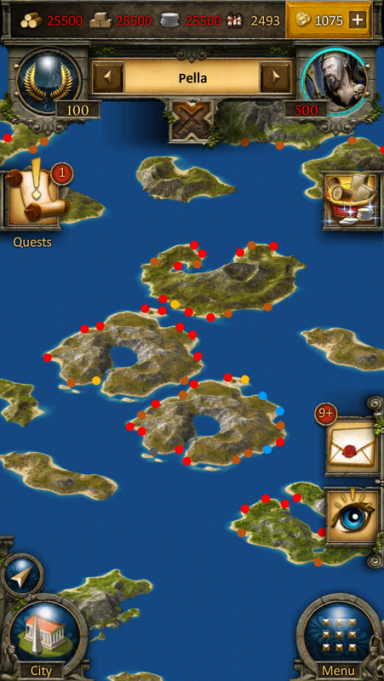
The Map
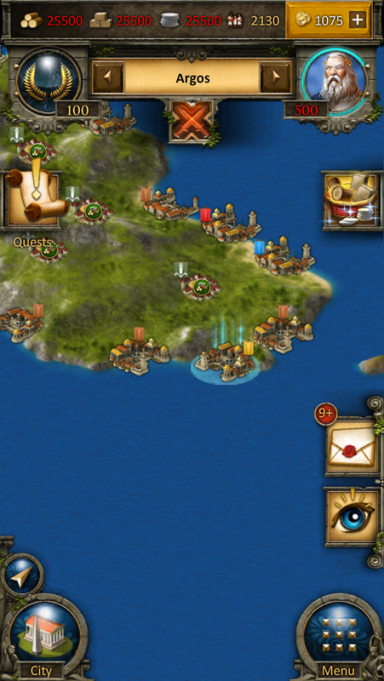
The map screen is one of the most important features of the app because it is used for your main navigation. It provides a clear overview about islands including all kinds of cities, farming villages, free slots, world wonders, and other information that is interesting for players. Seamless zooming combines the island overview as well as the world overview from the browser version in only one feature. This means that there is no separation between island and world maps anymore.
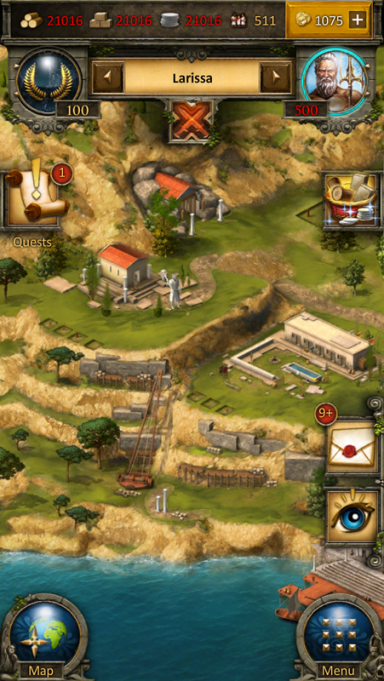
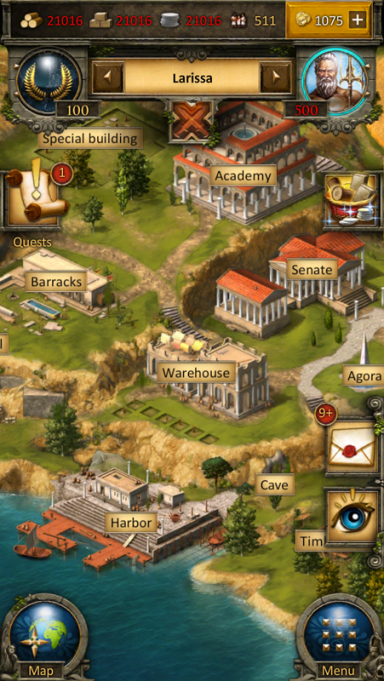
The City
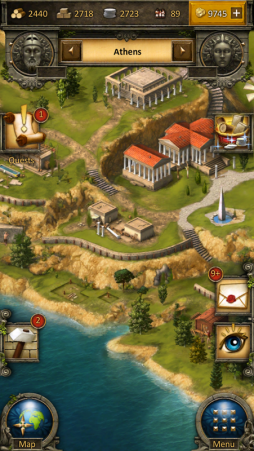
The city overview is similar to the browser version. You can interact with all buildings available in your city by tapping them. To increase usability of this view you can zoom in and out and also move your city to access your points of interest just like the navigation on the map.
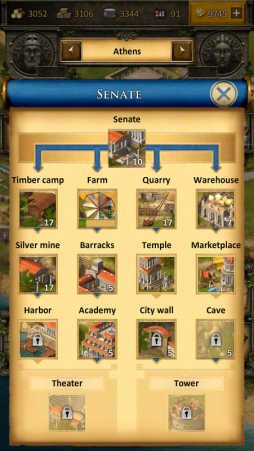
Construction
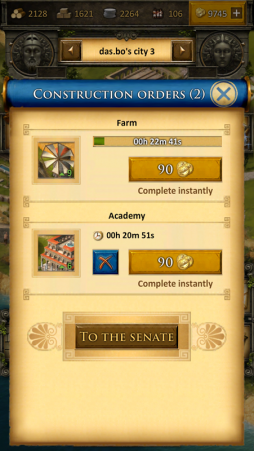
The construction menu available through the senate has a different layout compared to the browser version. Greyed out buildings have not yet been constructed and each building has an indicator of its current level. You can also see current constructions. In our example the farm is currently being upgraded from level 8 to 9 which is shown by the progress bar and the green 9. If you close the screen and tap on the hammer icon on the left in the UI, you can see the construction queue of the senate.
Recruitment
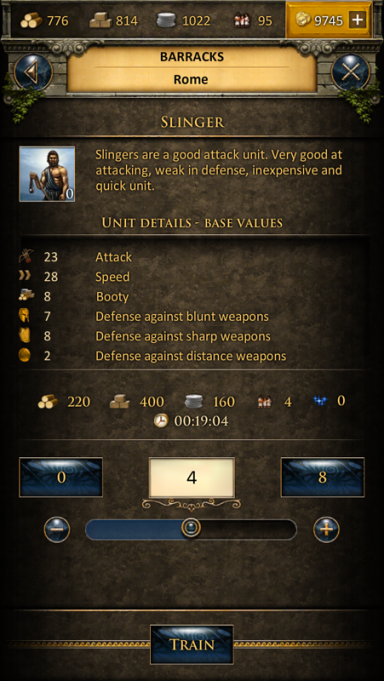
The recruitment process in the barracks and harbor is also slightly different from the browser version. Each unit has an elaborate information screen and you can enter your desired amount of units to be recruited or simply use the slider at the bottom to determine the desired value. Current recruitment orders can also be followed by progress bars.
Research
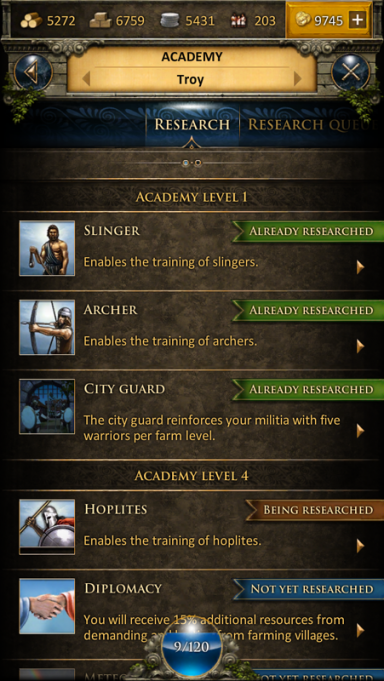
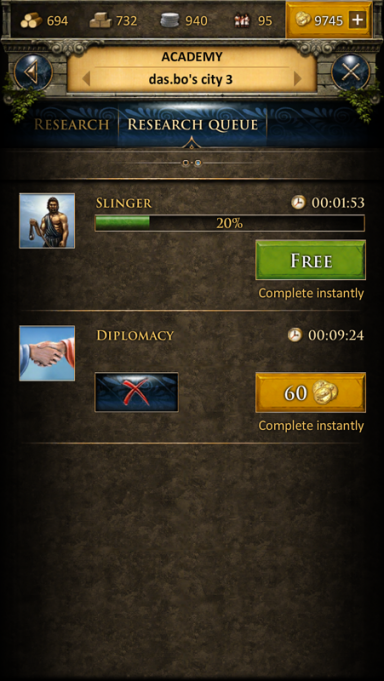
The research table of the academy is designed to provide information on each research as well as its availability. Here you can select to research any technology available and also check which technologies have already been researched in this city. At the top of this window you can directly slide right to the research queue to view the current research progress in your city.
Worship
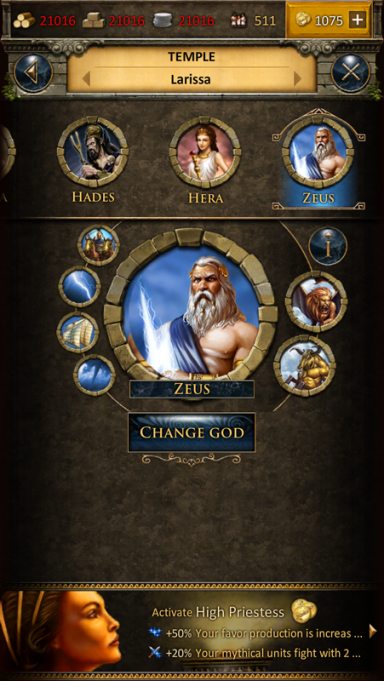
It is very easy to worship a god in your temple overview. At the top you can slide between the gods and use the button in the center of the screen to worship or change your god. The info button will display more detailed information about the corresponding god.
Tutorial and Quest System
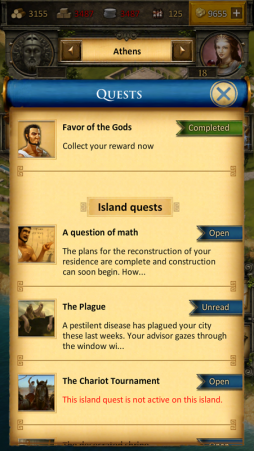
The game's tutorial and quest system will also be fully accessible in the app, however, it is displayed somewhat differently compared to the browser version of Grepolis. The first tutorial quests will automatically pop up when they are available. You can also choose to click the quest symbol in your interface to access the quest list. In this list all available quests are displayed also showing the current status (e.g. open or active). From here you can simply select a quest to access further information and actions regarding this specific quest. The tutorial is designed to guide your first steps in the game. You can complete the tutorial quests to get its features explained.

