Reservation Tool
The 2.0 Map Interface
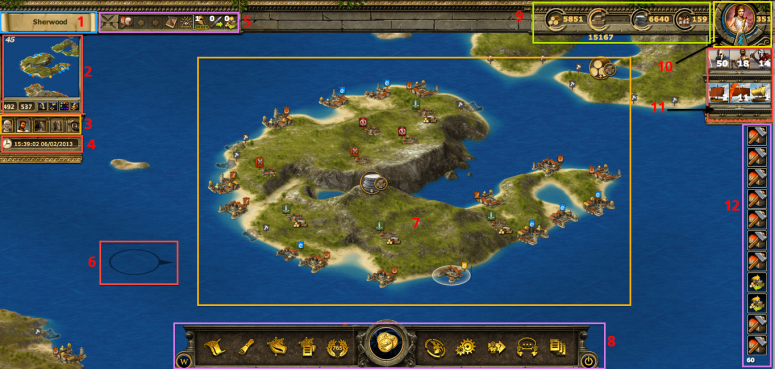
As you can see from the image above, most of the screen is given to the map view. Through the sidebars and tool bar at the top of the screen, a player can access all of the information that is needed for them to play the game.
The game screen is made up of four toolbars.
- On the left sidebar, a player will see the mini-map, which advisors are active, and the game clock.
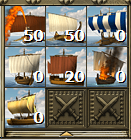
- The right sidebar contains the god which is being worshipped in that city, the units which are currently in that city (including support troops) and your reports.
- The top toolbar shows the city name, attack notifications, buttons to switch between cities, movement indicators and also resources in the city.
- The botton task bar is the place from which the player is able to access many key features of the game such as your Alliance Forums, your reports and the world rankings.
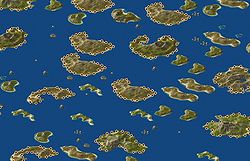
It is possible to zoom in and out while looking at this view to see more of the local ocean. To do this, press either Ctrl + to zoom in, or Ctrl - to zoom out.
Bottom Taskbar- 1
The table below shows all of the different buttons that you will find on the bar, click on them to find out a bit more information about each of them. From this bar a player can quickly access many of the most important features of the game such as their alliance forums and messages. For many players this is the heart of the Grepolis interface.

|
Reports | 
|
Messages | 
|
Alliance | 
|
Alliance Forums | |||
|---|---|---|---|---|---|---|---|---|---|---|

|
World Rankings | Use Gold | 
|
Profile | 
|
Invite Friends | ||||

|
Alliance Chat | 
|
Wiki | 
|
Settings | 
|
External Forums |
Left Sidebar
The left sidebar contains the mini-map and shows you which advisors are currently active.
The Mini-Map-2
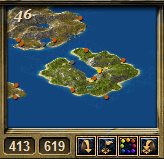
The mini-map show's a smaller version of your local area in the ocean. Cities appear as colored dots and reflect the state of affairs between your cities and other cities. The ocean number appears in the upper left corner of the mini-map and if you hover the mouse over the mini-map, in the lower left corner a magnifying glass will appear. If clicked, this will replace the main map with an expanded version of the mini-map.
Beneath the mini-map you will find the (X,Y) coordinate system, and 4 buttons. By entering values between 000-999 in either the X or the Y boxes, you can view any place in the world. There are 4 buttons next to the map coordinates. The table below explains their functions.
Advisors-3
Just below the mini-map is a place which lets a player know which advisors are currently active. If the portrait is greyed out, then the advisor is not active. Clicking on any of the images will bring up the premium window. This will allow a player to choose which advisors to activate, or whether to extend their use beyond the regular 14 days.
Game Clock-4
The game clock will automatically be set to GMT+1 (UTC+1) which is the timezone in which the servers are located. This setting can be changed under Settings, however, many players prefer to keep the clock on the default timezone.
Top Toolbar-5
The top toolbar gives a player various information through the use of icons. A player will see the name of the city currently selected, any incoming attacks, how many trades are taking place, and what resources are held in the warehouse for that city.
City Name Scroll
This scroll is located just above the mini-map and the left sidebar. Many players tend to pick a theme to use when naming their cities, and others prefer to use a system which allows them to know which cities are in which oceans. By double-clicking on this scroll, a player can rename the current city. A single click will open up the City List and allow you to quickly select a different city without scrolling through all of them.
Attack Notice
City Scrolling
This set of icons allows you to move through your cities and oversee your cities. It's a simple scrolling method which is used and it goes through the cities in alphabetical order. The first icon allows a player to open up the city overview, the same as the link on the left sidebar. The tablet opens up your notepad, and the all-seeing eye pyramid gives access to the various advisor overviews.
Movements and Orders
This set of icons contains information about all troop movements, recruitments, and trades. By hovering the mouse over each icon, a player can see a drop-down list of the times left for recruiting orders, attack count-downs, and remaining time before trades are completed.
Resources and Population-6
This shows how much of each resource are currently stored in the warehouse. You are also shown how much free population you have left.
Right Sidebar
The right sidebar provides information about the god currently being worshipped in the city and also a count of the total troops in the city.
Olympian and Favor-7
The upper right corner of the sidebar gives a portrait of the god being worshipped in the selected city. Around the portrait is the favor meter. The higher the favor, the more the blue line will wrap around the portrait. The amount of favor a player has will be given to the right of the portrait.
By clicking on the image of the lightening bolt, you will be shown a list of the spells that can be cast on that city. All spells for all gods being worshipped will be available. You will only be able to cast spells if you have enough favor.
Troops-8
Land Troops
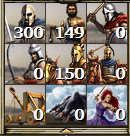
Underneath the portrait of the worshipped god, is displayed the troop indicator. This panel can be expanded to show all available troop types in the city as shown by clicking on the arrow under the bottom row. Troops shown here are also inclusive of support troops currently stationed in the city.
Just like the land troops, this section shows all of the current naval units within the city. The panel can also be expanded to show the available types which can be made within the city. Support troops are also included in the numbers.

